Grain-Free Stuffed Peppers

I’ve been making a version of stuffed peppers for many years now. I’ve played with the recipe and finally found one where, Jim and I both say, “Nailed it!”. Stuffed peppers just say fall and winter comfort to me, know what I mean? This batch will also feed a small army, so have some friends over or plan for leftovers!

If you prefer not to eat dairy, it can easily be made without cheese. You can also use whichever type of ground meat that you have on hand.
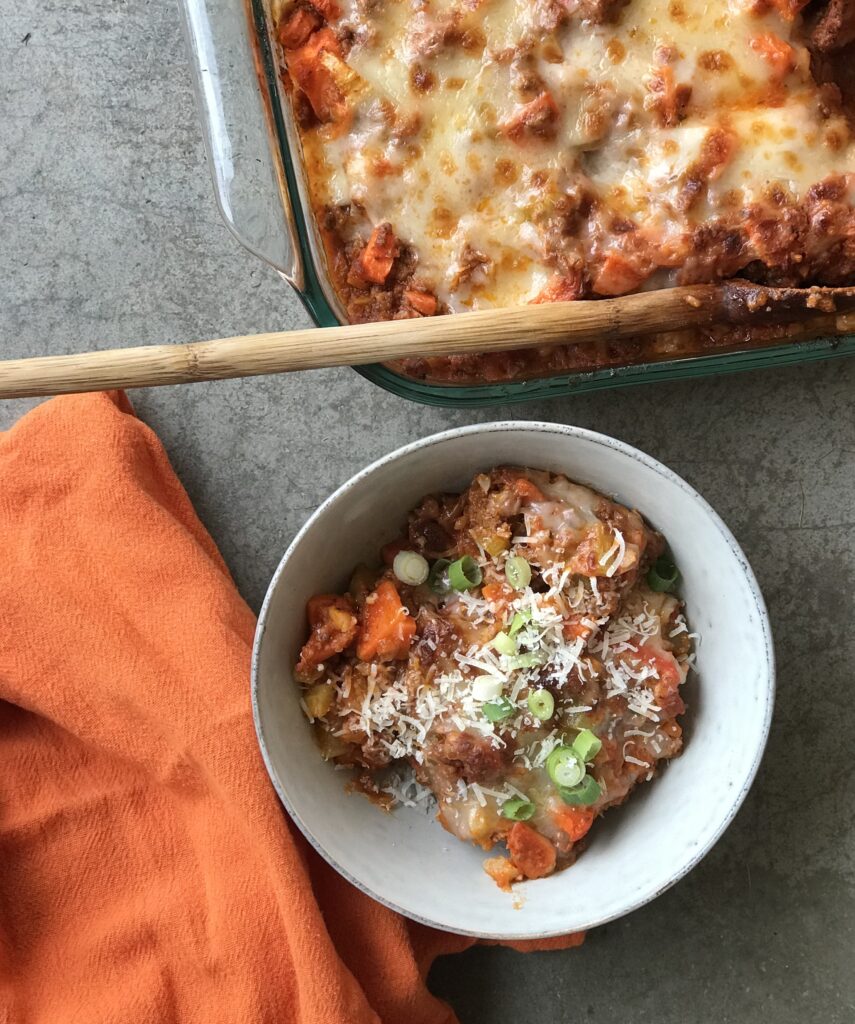
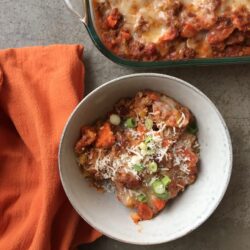
Grain-Free Stuffed Peppers

cleaneatingwithkatie
There's something about stuffed peppers that just says warm comfort fall food to me. This recipe is great for family Sunday Night Dinners or just a weeknight meal, but beware – there'll be leftovers!
Cook Time 50 minutes
Course casserole, Main Course
Cuisine American

Ingredients
  

  • 5 bell peppers halved, seeds & stem removed
  • 2 tbsp cooking fat
  • ½ onion, diced
  • 4 cloves garlic, minced
  • 2 large carrots, diced
  • 4 celery stalks, diced
  • 1 package cauliflower rice fresh or frozen
  • 1 tsp sea salt
  • ½ tsp fresh ground pepper
  • 32 oz Otamot Foods Tomato sauce
  • 2 lbs ground bison or any ground meat
  • 2 tbsp Italian spice blend
  • 8 oz mozzarella cheese, grated

Instructions
 

  • Preheat oven to 350° F. Add the bell peppers to a 13 x 9 in. baking dish, facing up. When the oven has preheated, add the baking dish to the oven for 20 minutes. 
  • You may need to cook the meat in one pan and the veggies in another pan, unless you have a very large saute pan. Add 1 tbsp. of the cooking fat to a large saute pan over med.-high heat. Add onions and garlic and cook for 3-4 minutes until fragrant. Add in celery, carrots, and cauliflower rice. Stir and continue to cooking over med.-high heat. Add sea salt and pepper. Add in one jar of Otamot Tomato Sauce. Stir and cook for 20 minutes until veggies are cooked through. 
  • While the veggies are cooking, add the remaining cooking fat to a separate skillet on med.-high heat. Add in the ground bison and season with Italian seasoning. Continue cooking for about 10 minutes. Add in the second jar of Otamot tomato sauce, stir, and cook until meat is done.   
  • Combine the ingredients from both pans in the larger skillet or in a large bowl. Stir to combine. 
  • Remove the par-baked bell peppers from the oven. Using caution with the hot peppers. Add stuffing to each pepper – they will likely be overflowing – that's ok. Top with grated mozzarella cheese. 
  • Place the baking dish in the oven and cook for 15 minutes until cheese is melted. Serve and enjoy!  
Keyword casserole, gluten-free, gluten-free dinner, grain-free, grain-free dinner, main dish, stuffed peppers

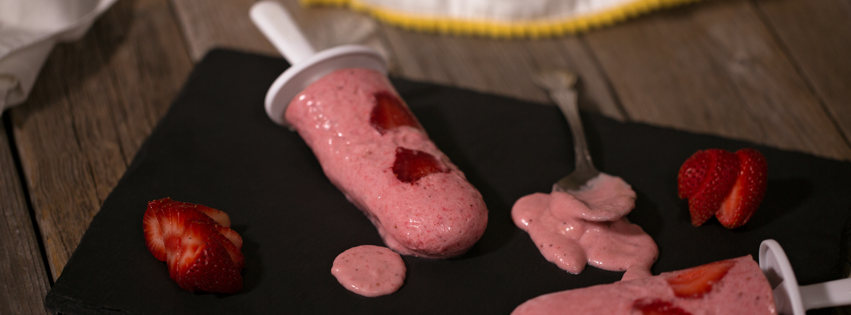
Strawberry Banana Popsicles

These are a perfect treat for warm summer nights. Best of all, they only have THREE ingredients and are free of refined sugars! I imagine that you could also swap out the strawberries for other berries, for peaches, or pineapple as well.

Strawberry Banana Popsicles

cleaneatingwithkatie
These Strawberry Banana pops are quick, tasty, have only three ingredients, and use no refined sugar!
Prep Time 10 minutes
Course Dessert
Cuisine American
Servings 4 people

Equipment

  • popsicle molds

Ingredients
  

  • 3 bananas very ripe
  • 3 cups strawberries stems trimmed
  • ½ can full-fat coconut milk
  • 5-6 strawberries thinly sliced, for garnish

Instructions
 

  • When measuring out the full-fat coconut milk, be sure to get about half of the liquid coconut milk and half the solid coconut fat.
  • Add bananas, strawberries, and coconut milk to high speed blender and blend on high until smooth. 
  • Before pouring liquid into popsicle molds, stick 2-3 strawberries onto the sides of the molds and then add the liquid. 
  • Freeze for 2-3 hours until frozen. Enjoy!
Keyword dairy free, dessert, gluten-free, grain-free, paleo, popsicles, strawberry banana popsicles

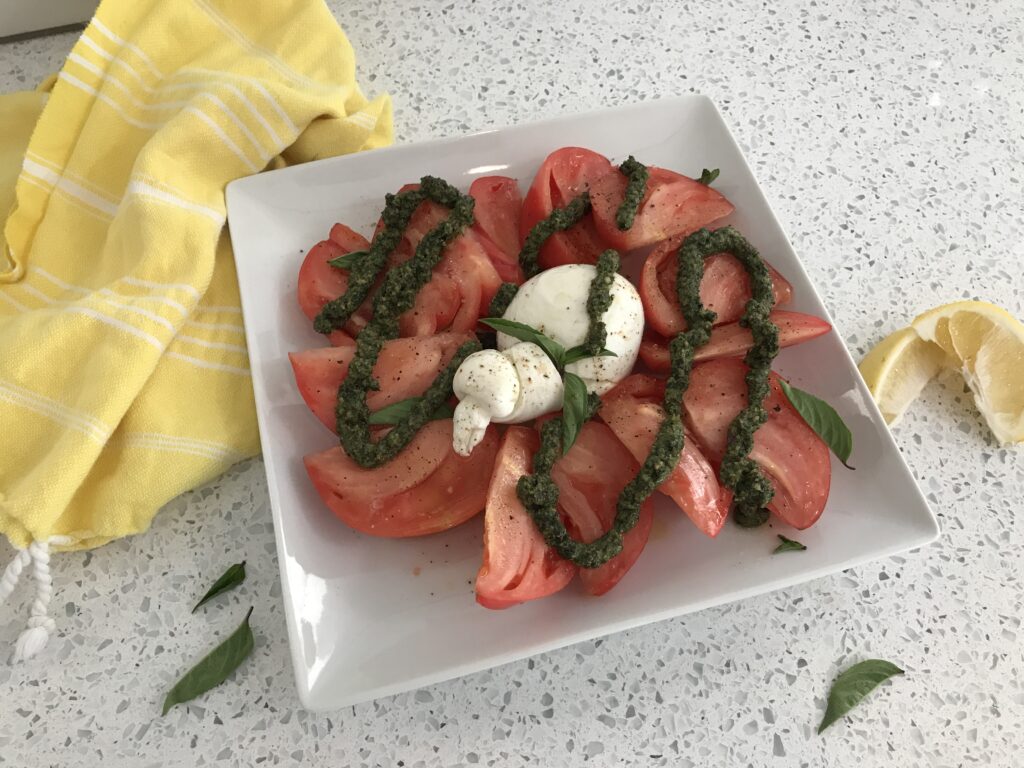
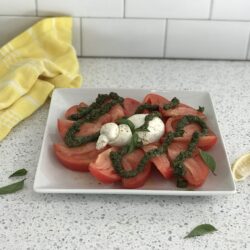
Heirloom Tomato and Burrata Salad with Superfood Pesto

This is a great summer salad for those drool-worthy heirloom tomatoes. The pesto recipe can be used with the burrata and heirloom tomatoes OR use it wherever you like to use pesto – minestrone, salad dressing, on hard-boiled eggs, etc.

Heirloom Tomato and Burrata Salad with Superfood Pesto

cleaneatingwithkatie
This recipe takes pesto to the next level – and no one will know that it has kale in it!
Prep Time 15 minutes
Course Appetizer, Salad
Cuisine Italian
Servings 4 people

Equipment

  • Cuisinart Food Processor

Ingredients
  

  • 1 large bunch of basil
  • 3-5 kale leaves destemmed
  • cup pine nuts
  • cup extra-virgin olive oil
  • 1 lemons, juiced
  • ¼ cup parmesan cheese optional
  • 1 large heirloom tomato
  • 1 container burrata cheese
  • 1 tsp garlic sea salt
  • 1 tsp lemon pepper
  • 1 tbsp extra-virgin olive oil optional garnish
  • flake salt optional garnish
  • fresh ground pepper optional garnish

Instructions
 

  • Rinse and trim the basil leaves. Add the kale, basil, pine nuts, olive oil, lemon, garlic sea salt, lemon pepper, and parmesan to a food processor or high-speed blender.
  • Pulse on high until smooth.
  • Add to a jar and set aside. 
  • Slice the heirloom tomato into wedges and add to your plate. (Pictured here is a brandywine heirloom tomato).
  • Add the burrata and drizzle the tomato and cheese with olive oil, sea salt, and fresh cracked pepper. Add the superfood pesto to the salad.
Keyword appetizer, heirloom tomato salad with burrato and superfood pesto, salad

Seasonal Charcuterie Platter

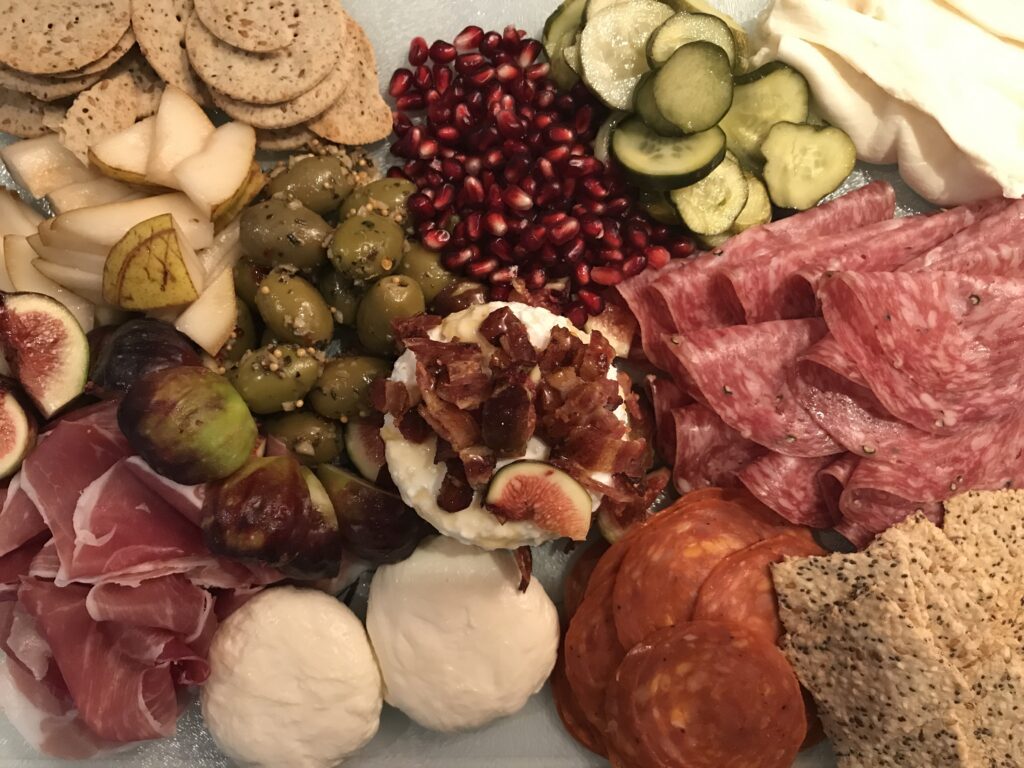
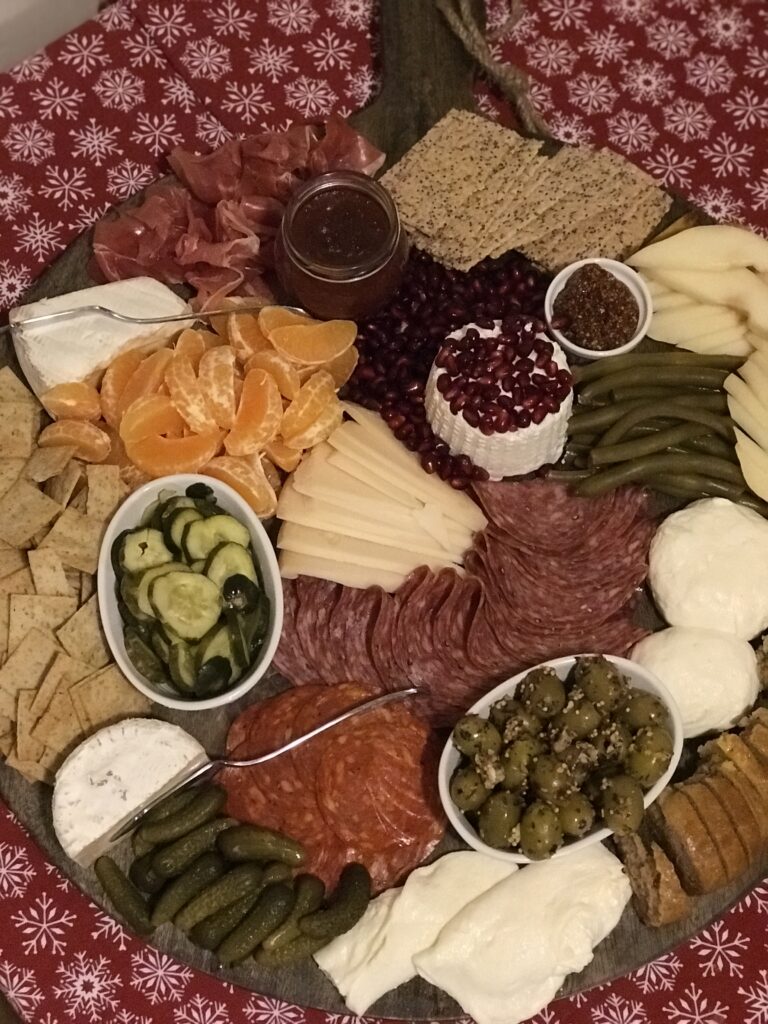
Cheese board, charcuterie platter, meat and cheese plate, whatever you call it, they are all the rage. This seasonal charcuterie platter made its debut at our Thanksgiving table in 2017 and a similar one appeared at Christmas that year as well. If you’ve already committed to a different dish – don’t fret, bring this to any upcoming gathering. Needless to say, this is more inspiration than a recipe – I encourage you to use your favorite cheeses and whatever fruits are in season!

Thanksgiving Seasonal Charcuterie Board
Christmas Seasonal Charcuterie Board

How to Build a Seasonal Charcuterie Platter:

  • Select 2-4 types of cured meats.
    • Salami, smoked chorizo, and prosciutto are pictured here and just some examples of smoked and aged meats. Pate would be another good option.
  • Select a mixture 3-5 of cheeses.
    • Pictured here are Goat milk chèvre, mozzarella, and burrata (Thanksgiving) and I added manchego and Brie. I recently took a cheese making class where we learned how to make these three cheeses, hence why these are included in the cheese board. I do suggest a mixture of hard and soft cheeses. For the chèvre, I added bacon, figs, and a drizzle of honey (in the center of the Thanksgiving picture) and pomegranate seeds on the Christmas picture)
  • Add crackers and/or bread. 
    • Here I have Jilz crackers and Simple Mills crackers
    • For the Christmas board I added homemade paleo bread
  • Add Seasonal Fruits and/or preserved fruits. 
    • We have pears, pomegranates, and figs pictured here. For Christmas I included pears, mandarin oranges, pomegranates, and some quince paste.
  • Lastly, add some veggies and olives. 
    • For Thanksgiving, we had olives and Sonoma Brinery pickles. For Christmas, I will also inlcude pickled green beans and cornichons. 

As we are now in the winter months, my goal for this charcuterie platter is to include only preserved foods and in-season foods.

I hope you try out a Seasonal Charcuterie Platter in the coming months! 

Here is a link to Farmcurious, where I took the cheesemaking class. She also sells kits for those that aren’t local. The kits include the recipes for how to make the cheeses :). 

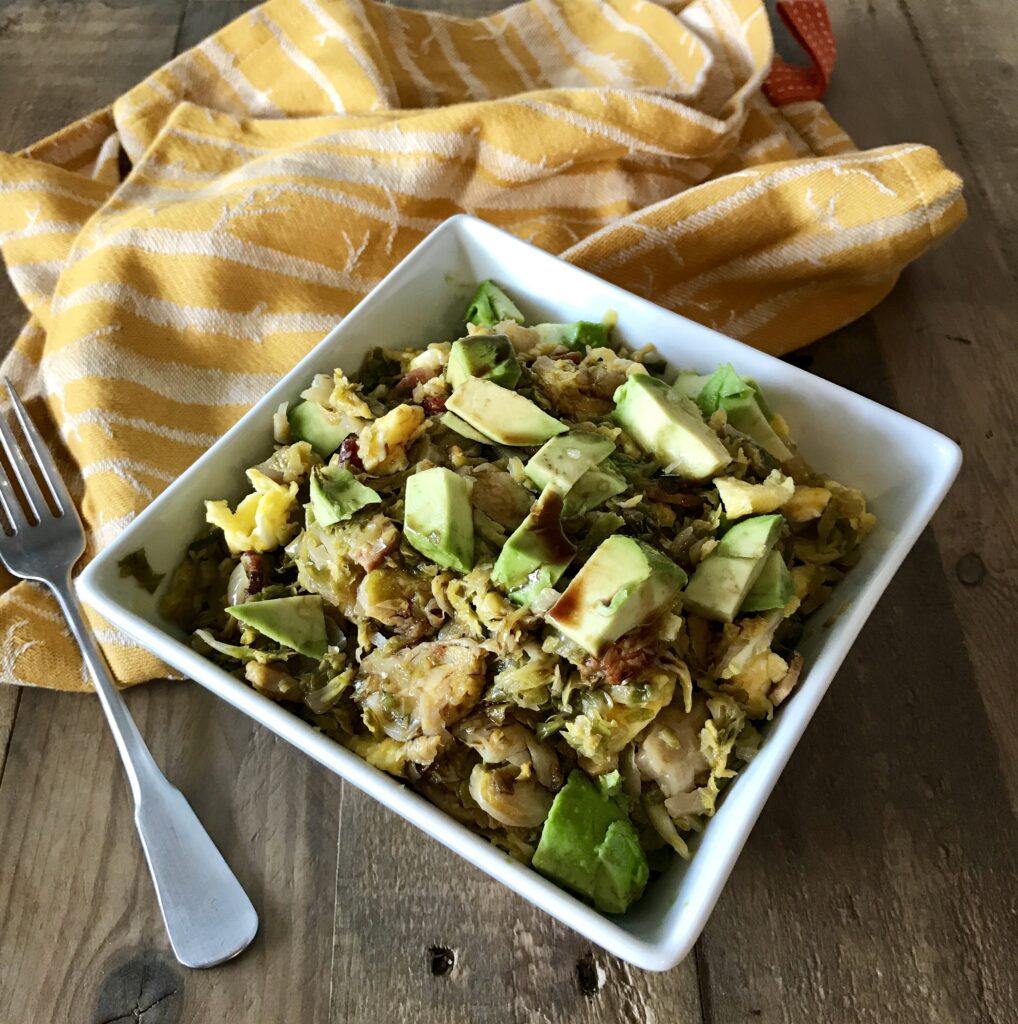
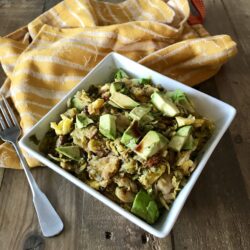
Warm Brussels Sprouts Salad

For me, Brussel sprouts are literally THE most exciting seasonal vegetable in the fall and winter (well, tied for first with butternut squash). I remember the first time I had Brussels sprouts was in 2009. It was part of a veggie medley at a wedding and it was a WHOLE Brussel sprout. It was terrible. Who cooks them whole? About a year and a half later, I bought them at the farmers market and found a recipe that called for them to be halved and roasted with butter and bacon. Much better. Over the years I have tried many recipes and pretty much try to eat them as much as possible in the fall and winter. Here is current favorite Brussels Sprouts recipe.

I’m convinced that there are two keys to Brussels Sprouts, 1) bacon (I’m sorry if you don’t eat bacon) and 2) thinly sliced or shaved. I can handle quartered, but not even halved. They are so densely packed, THIS is the key to loving them. I like using my food processor and using the slicer attachment.    

Warm Brussels Sprout Salad

cleaneatingwithkatie
This Brussels Sprouts Salad will be a crowd pleaser at your dinner table or at your next event — even if for Brussels Sprouts haters! The key is to thinly slice or grate them for even cooking, otherwise they are a mix of overdone and underdone. Blech.
Cook Time 30 minutes
Course Salad, Side Dish
Cuisine American

Equipment

  • Cuisinart Food Processor (with a slicer attachment)

Ingredients
  

  • 4 tbsp cooking fat bacon fat, ghee, butter, etc.
  • 1 med. onion diced
  • 8 slices pasture-raised bacon cooked and crumbled
  • 3 eggs pasture-raised
  • 2-3 lbs. brussels sprouts trimmed and thinly sliced
  • 1 avocado cubed
  • 2 tbsp balsamic vinegar
  • 1 tsp sea salt
  • ½ tsp fresh ground pepper

Instructions
 

  • Melt 1 tbsp of cooking fat in large skillet, sauté onions until almost translucent. Remove and set aside.
  • Crack three eggs into a bowl and whisk. Melt 1 tbsp of cooking fat in the skillet and add the eggs. Stir the eggs until scrambled. Remove and set aside. 
  • Add 2 tbsp butter and thinly sliced Brussels sprouts to the skillet. Season with sea salt and pepper and sauté. Cook for approximately 10-15 minutes, mixing regularly.
  • Add the onions, Brussels sprouts, eggs, and bacon to a large bowl and mix. Add the cubed avocado on top of the Brussels sprouts mixture. Drizzle balsamic vinegar on top, and season with salt and pepper to taste. Serve warm.
Keyword brussels sprouts, gluten-free, grain-free, grain-free side dish, paleo, paleo side dish, salad, warm brussels sprouts salad

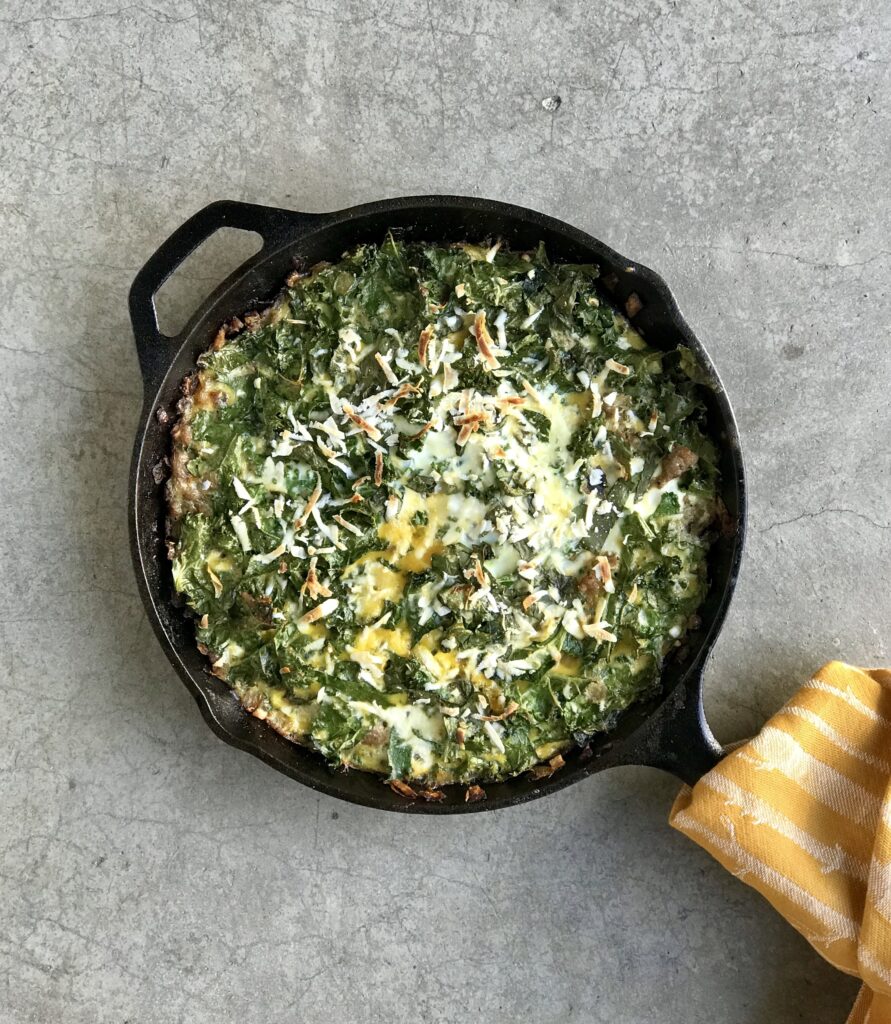
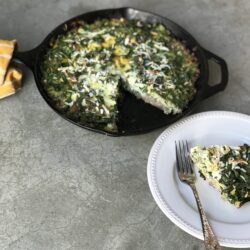
Kale and Sausage Frittata

Is it just me or are FRITTATAS all the rage? I always felt like they looked too complicated, but honestly it’s quite easy AND now I have a few days worth of breakfasts for the week. If you don’t already have one, I would invest in a cast iron skillet – I do think that is key. You can get a medium size Lodge brand cast iron skillet for under $50. It’s a great cookware investment.  

Kale & Sausage Frittata

cleaneatingwithkatie
Frittatas are an easy way to have a nutrient dense breakfast prepared for several days. I don't know about you, but a quick and easy protein-rich breakfast gets me started on the right foot each day.
Cook Time 50 minutes
Course Breakfast, Brunch
Cuisine American
Servings 6 people

Equipment

  • Lodge Cast Iron Skillet

Ingredients
  

  • 1 tbsp cooking fat
  • 1 med. onion diced
  • 4 kale leaves destemmed & coarsely chopped
  • ¼ cup loosely packed basil chiffonade
  • 8 eggs pasture-raised
  • ¾ cup bulk pork sausage
  • 2 tbsp mizithra cheese grated
  • 1 tsp sea salt
  • ½ tsp fresh ground pepper
  • ½ tsp granulated garlic
  • ½ tsp dried oregano
  • ½ tsp sage
  • ½ tsp dried parsley

Instructions
 

  • Preheat the oven to 350° F.
  • Melt the cooking fat in a cast iron skillet on medium-high. Rotate to coat the pan.
  • Add the onions and sauté until just translucent. Add the sausage and cook through using a spatula to break apart the meat. 
  • In a medium bowl, crack the eggs, whisk, and add six seasonings. Stir to combine. 
  • Once the sausage has cooked through, add the kale to the pan and begin to wilt. Then add the eggs. Stir just enough to disperse eggs throughout the pan. 
  • Top with basil and mizithra cheese. 
  • Bake at 350° F for 15-20 minutes or until the eggs have puffed up and solidified. Serve warm – Enjoy!

Note:

  • The frittata tends to stick if stored in the cast iron skillet. Take any leftovers out of the pan before refrigerating.
Keyword breakfast, brunch, frittata, gluten-free, grain free breakfast

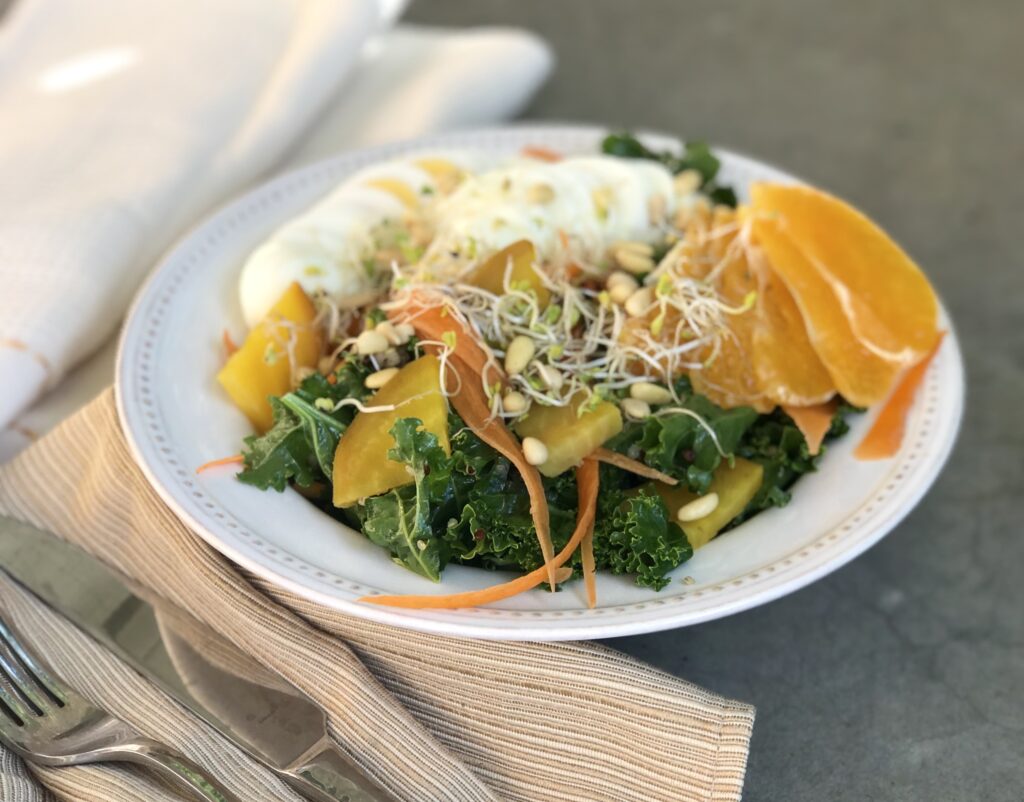
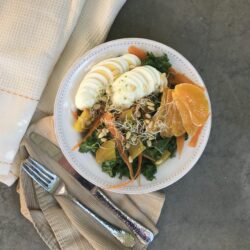
Massaged Kale Salad

Massaging Kale? Is she kidding? Nope, not kidding. Kale is a great veggie and is all the rage these days, BUT it can be hard for some to digest when eaten raw. It’s a very dense leafy green and massaging it can help break it down (aka pre-digestion) which makes it easier to digest. You can use about a tablespoon of olive oil and just get in there with your hands and massage away!     

Massaged Kale Salad

cleaneatingwithkatie
Kale is all the rage these days but for some people, when eaten raw it can cause digestive distress. When massaged with some extra virgin olive oil, it can help to make the kale more digestible. This salad is a like a taste of spring in every bite because combines many spring veggies.
Prep Time 15 minutes
Course Main Course, Salad
Cuisine American
Servings 4 people

Ingredients
  

Salad Ingredients

  • 8 hard-boiled eggs pasture-raised
  • 2 large beets boiled, peeled, & sliced
  • 1 bunch kale destemmed & coarsely chopped
  • 1 cup sprouted quinoa cooked
  • 6 carrots sliced into strips using a veggie peeler
  • cup pine nuts
  • 1 sumo citrus peeled & segmented
  • ¼ cup broccoli sprouts

Salad Dressing Ingredients

  • 2 lemons juiced
  • 4 tbsp extra-virgin olive oil
  • 1 tsp garlic sea salt
  • 1 tsp lemon pepper

Instructions
 

  • Add 1-2 tablespoons of olive oil to a large bowl with the chopped kale. Massage oil into the kale leaves until well coated.
  • Add the quinoa and toss. Then add the beet slices and carrot strips. Toss again.
  • Plate out a serving of the kale, quinoa, beet, and carrot mixture. 
  • Top with two sliced hard-boiled eggs, 3-4 segments of sumo citrus, sprouts, and some pine nuts. 
  • Add dressing ingredients into a small glass jar and shake. 
  • Drizzle dressing over the salad and enjoy!

Notes

  • I prefer to use sprouted grains whenever possible. I usually buy TruRoots, and I can find it at Sprouts, Whole Foods, and Costco. I enjoy buying Love Beets when I don't have the time to boil and peel my own. I can also find these at Costco, Whole Foods, and Sprouts. You can change out any of these ingredients and keep this salad fresh and evolving with the seasons. I chose these items because they are in season in mid spring.
Keyword gluten-free, kale salad, salad, seasonal salad

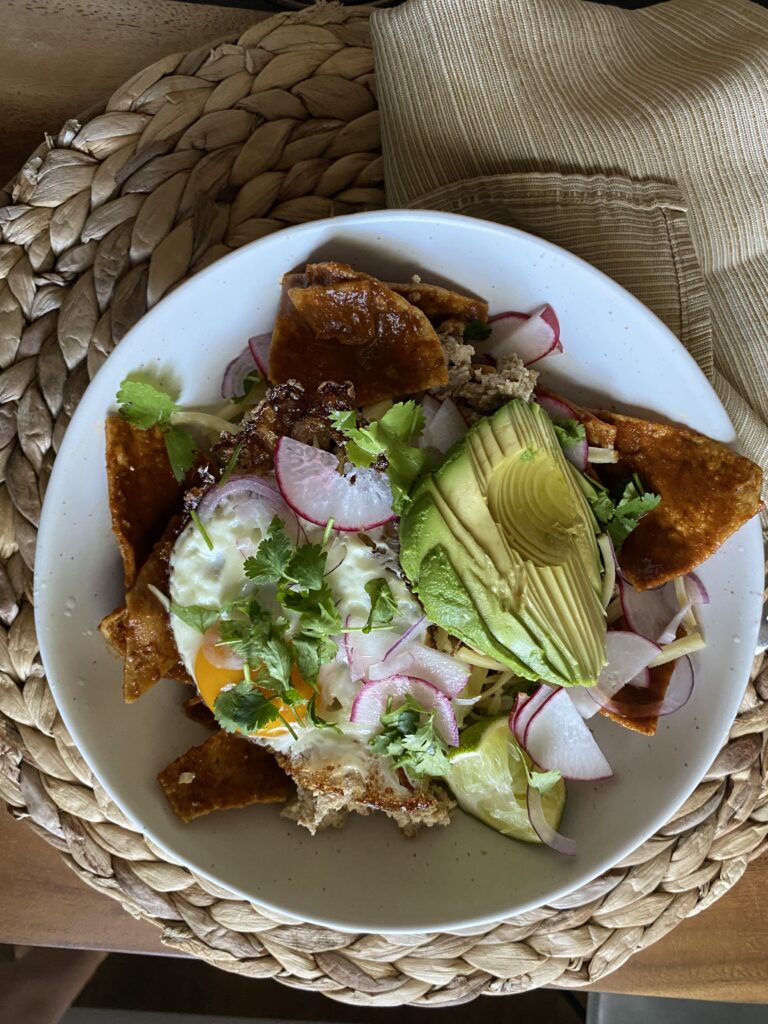
Chilaquiles

My first taste of chilaquiles was in Cabo San Lucas in 2016. I know, I’ve been living under a rock. Since then I’ve had them a few additional times and it’s heaven every time. There’s one big problem with restaurant chilaquiles: they’re using chips fried in vegetable oils. I don’t 100% avoid vegetable oils, but I avoid them about 95% of the time. Not sure why I avoid vegetable oils, read more here.

How do Chilaquiles fit into a seasonal eating model? Cilantro, radishes, and onions are all in season right now. Plus, I made these for Cinco de Mayo!

Chilaquiles

cleaneatingwithkatie
Chilaquiles just might be the perfect food. There is a nice balance of carbohydrates, protein, and fat, plenty of vegetables and they are packed with flavor! If you haven't made them, you will not regret making them for breakfast, lunch, or dinner!
Cook Time 50 minutes
Course Breakfast, Main Course
Cuisine Mexican
Servings 4 people

Ingredients
  

Chilaquiles Sauce

  • 7 oz organic tomato paste
  • 12 oz chicken bone broth
  • 4 tsp ancho pepper adobo sauce
  • 2 tbsp taco seasoning
  • ¼ tsp sea salt
  • fresh ground pepper

Ingredients

  • 4 eggs pasture-raised
  • 1 lb pasture-raised ground turkey or ground meat of choice
  • 1 tbsp taco seasoning
  • 1 bunch radishes cut into half moons
  • 2 spring onions thinly sliced
  • 2 avocados halved and thinly sliced
  • 8 oz sour cream
  • 8 oz cotija cheese crumbled
  • 3 tbsp cooking fat ghee, butter, bacon fat, etc.
  • 2 bags Masa Tortilla Chips
  • 1 lime quartered
  • sea salt to taste
  • fresh ground pepper to taste

Instructions
 

  • Add the broth and tomato paste to a large sauté pan at low-medium heat (the larger the pan the better). Mix together with a whisk. Add the ancho pepper adobo sauce, taco seasoning, sea salt, and pepper. Mix again. Allow the moisture to evaporate and thicken the sauce a little. Be sure to stir the sauce so that it doesn't stick to the pan and burn. The consistency should be similar to that of enchilada sauce. (Too thick? Add more broth. Too thin? Cook a little longer, continuing to mix with the whisk.) Set aside.
    Alternately, you can buy enchilada sauce. Caution here, as so many store bought items have junky ingredients. I like the Siete brand enchilada sauce.
  • In large skillet, add 1 tbsp. of cooking fat. Melt  over medium-heigh heat. Add ground meat and use a spatula to break up the meat and cook through. Add the taco and fajita blend while the meat is still raw to increase the flavor. Continue cooking until the meat is cooked through. Set meat aside in a medium bowl. 
  • Add remaining cooking fat to the skillet of medium-high heat. Once fat is hot, crack the eggs in the pan one at a time. Keep each separate from each other for ease of cooking and serving. Cook until whites are cooked through and yolk is at desired consistency. 
  • Depending on the size of the pan you used for the sauce, you may need to coat the tortilla chips in the chilaquiles sauce in two batches. Turn the chilaquiles sauce pan back on to low and add Masa Tortilla Chips (Masa tortilla chips are seed oil free and are my FAVORITE. Use code cleaneatingwithkatie to save 20%). Slowly mix to coat each chip. Chips should be soggy but still hold their shape. 
  • On each plate layer ¼ of chilaquiles chips. ¼ of the ground turkey, ½ an avocado, 1 fried egg, and onions, radishes, cilantro, sour cream, and cojita cheese to taste. Add a squeeze of lime and serve.
Keyword chilaquiles, fried egg, seed oil free

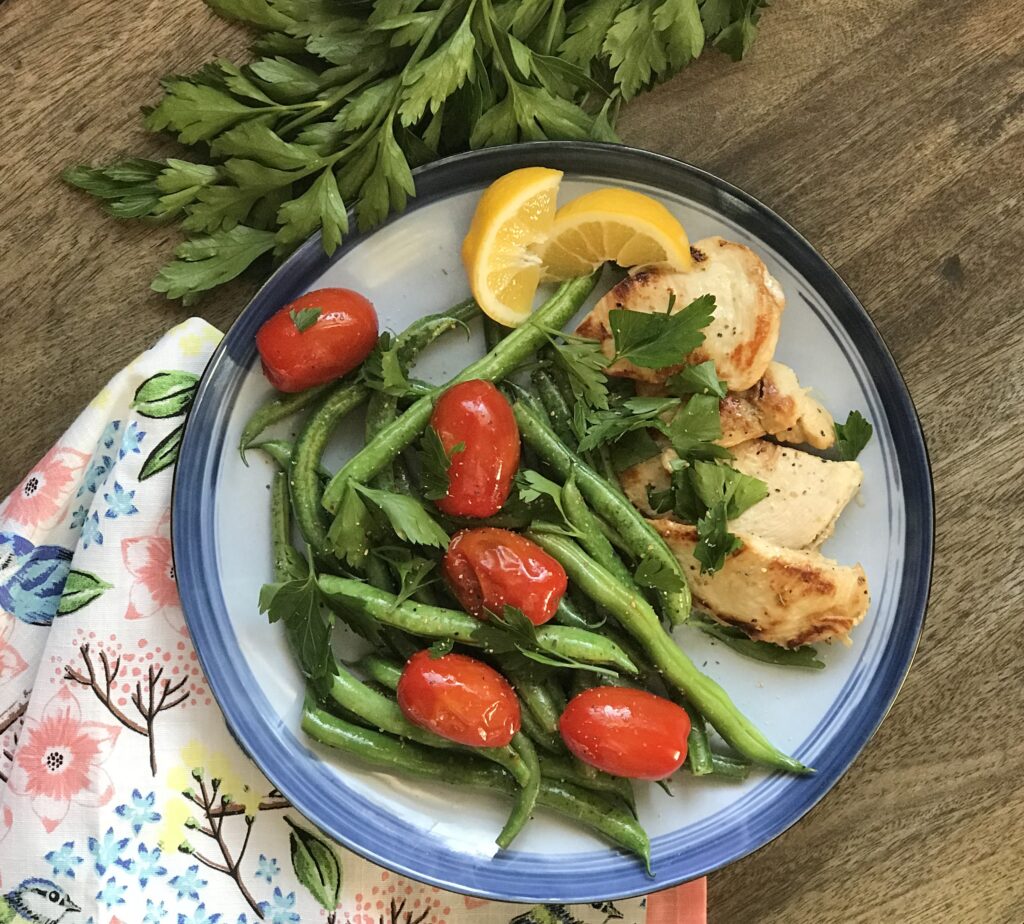
Lemon Chicken with Sautéed Green Beans and Blistered Cherry Tomatoes

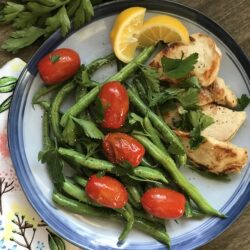
Green Beans have been my LEGIT top three favorite vegetables since I was a wee one. I LIVE for green bean season. And the green beans pictured here come from my mama’s garden (go mama!). And now that summer is here, green beans and cherry tomatoes are in abundance so this is the perfect time to make this recipe. 

Lemon Chicken with Sautéed Green Beans and Blistered Cherry Tomatoes

cleaneatingwithkatie
This is the perfect recipe that highlights seasonal summer veggies.
Prep Time 15 minutes
Cook Time 30 minutes
Course Main Course
Cuisine American
Servings 4 people

Ingredients
  

Chicken Marinade

  • 2 med. lemons, juiced
  • ½ cup extra-virgin olive oil
  • 1 tbsp lemon pepper Simply Organic
  • 1 tbsp garlic sea salt Simply Organic

Ingredients

  • 2 lbs boneless skinless chicken breasts organic, pasture-raised
  • 1 lb green beans trimmed
  • 1 basket cherry tomatoes
  • 2 tbsp parsley chiffonade
  • 6 tbsp grass-fed ghee Fourth & Heart is my fave
  • 1 lemon, juiced
  • 1 tsp lemon pepper
  • 1 tsp garlic sea salt

Instructions
 

  • Rinse the chicken and pat dry. On a cutting board, firmly push down on the chicken breast with the palm of your hand. Using a sharp knife in your other hand, fillet the breast by cutting into the breast with the knife moving horizontally through breast. Once filleted, cut in half. 
  • Add chicken to a large bowl and add the marinade. Mix to ensure all chicken is coated. Marinate for 4-6 hours in the refrigerator. 
  • After chicken has been marinated, add 3 tablespoons ghee to a large skillet and heat over medium-high. Once the ghee is hot, add the chicken pieces to the pan. Cook about 5-7 minutes until the underside has turned white and it is almost cooked through. Chicken should be browning on the underside. Turn over to continue cooking until chicken has cooked through. Remove from pan and continue cooking until all the chicken is cooked. 
  • While the chicken is cooking, melt 2 Tbsp of ghee in a medium skillet. Once the fat is hot, add the green beans, lemon pepper, garlic sea salt, and juice of 1 lemon. 
  • In a small sauce pan, add the remaining 1 Tbsp. of ghee and heat to just over medium heat. Add the cherry tomatoes and cook for about 5-8 minutes, allowing them to cook through and blister on the outside. 
  • Add chicken and green beans to plate, top with a few blistered cherry tomatoes and sprinkle with parsley and sea salt and pepper (to taste).
Keyword cherry tomatoes, green beans, lemon chicken, lemon chicken with sautéed green beans and blistered cherry tomatoes, main dish

Cantaloupe Gazpacho with Prosciutto

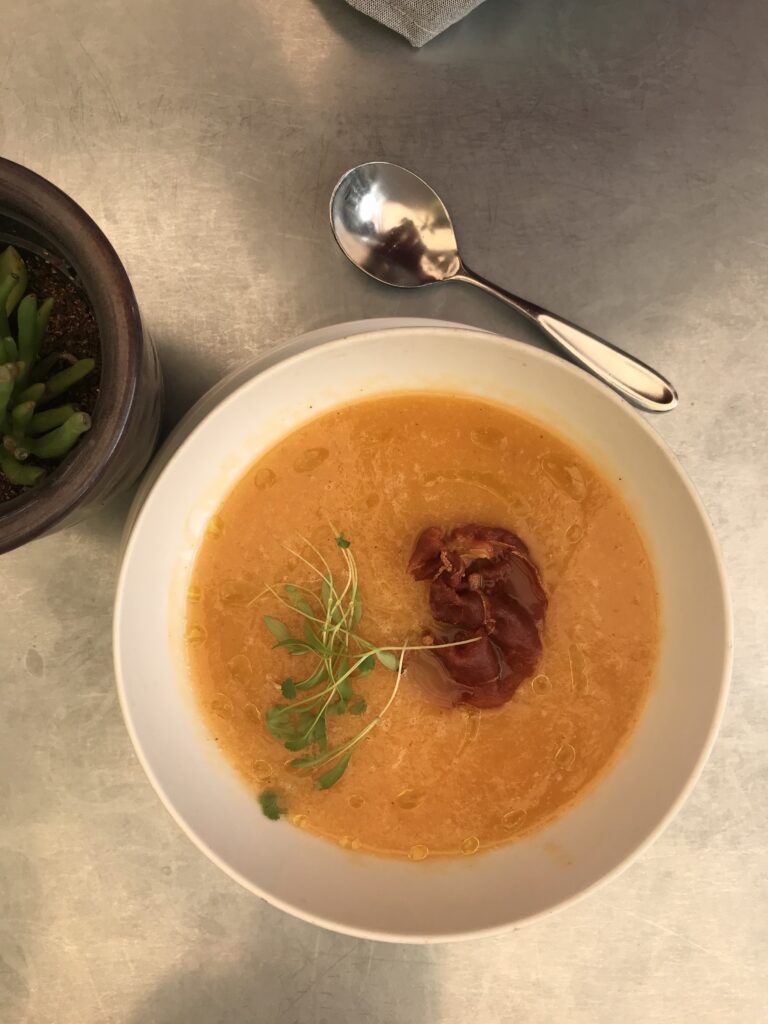
I first experienced a watermelon gazpacho in 2002 in Sedona, Arizona at a restaurant called The Secret Garden. I have no idea if their menu still includes watermelon gazpacho, but with a quick Google Search, it appears to still be in Sedona. Then a few weeks back at our favorite restaurant in SLO County, Thomas Hill Organics in Paso Robles, we had a DEVINE Cantaloupe Gazpacho that I instantly knew needed to be recreated. 
Pictured here is the Cantaloupe Gazpacho from Thomas Hill Organics.

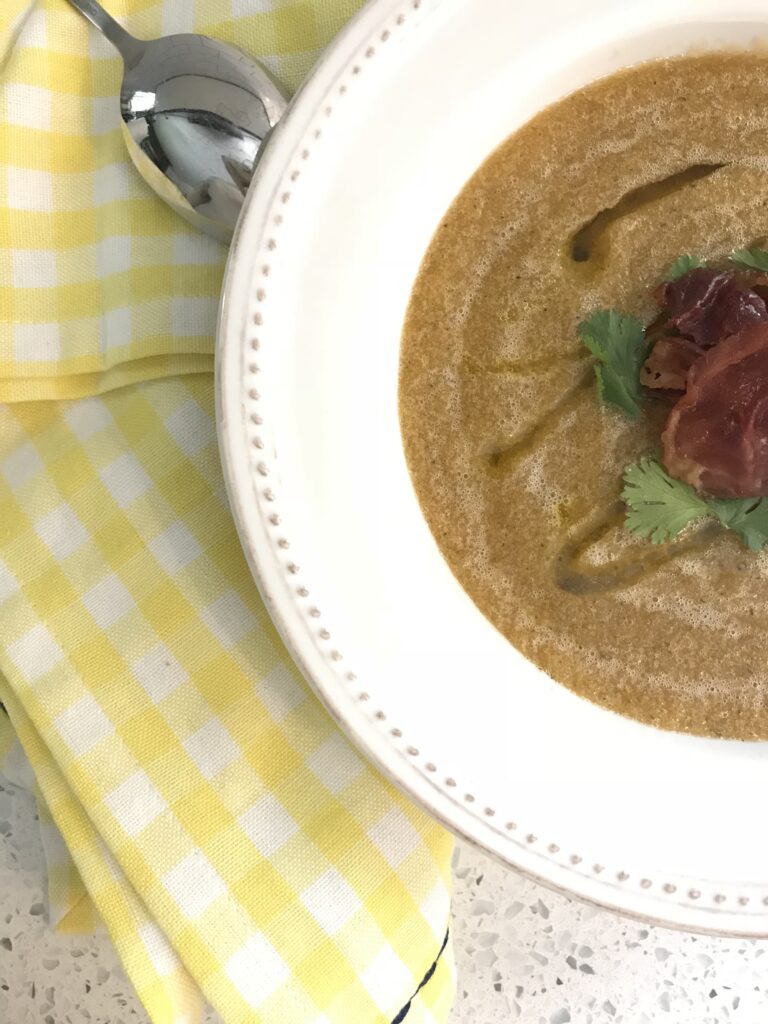
Cantaloupe Gazpacho with Prosciutto

cleaneatingwithkatie
The sweetness of the cantaloupe paired with the salty and savoriness of the prosciutto and with the herbs packs this soup with flavor. It's so simple and yet it feels very fancy.
Prep Time 15 minutes
Cook Time 5 minutes
Course Side Dish, Soup
Cuisine American
Servings 4 people

Ingredients
  

  • 1 large cantaloupe rind removed, seeded, & cubed
  • 4 mint leaves
  • 4 tsp extra-virgin olive oil garnish
  • cilantro leaves optional garnish
  • 4 pieces prosciutto garnish

Instructions
 

  • Add the cantaloupe and mint leaves to a high-speed blender. Blend until the consistency is very smooth. 
  • Refrigerate the cantaloupe mint mixture for at least one hour before serving. 
  • Before serving, heat a dry non-stick skillet over medium heat. Add prosciutto to the pan to crisp. Once it crisps up, turn over to crisp the other side. Allow to cool. 
  • Before serving, portion out the chilled cantaloupe gazpacho into four bowls. Drizzle with olive oil, add a few cilantro leaves, and one piece of crisped prosciutto to each bowl.
Keyword cantaloupe, cantaloupe gazpacho, gazpacho
Here is my copycat version of Cantaloupe Gazpacho.